
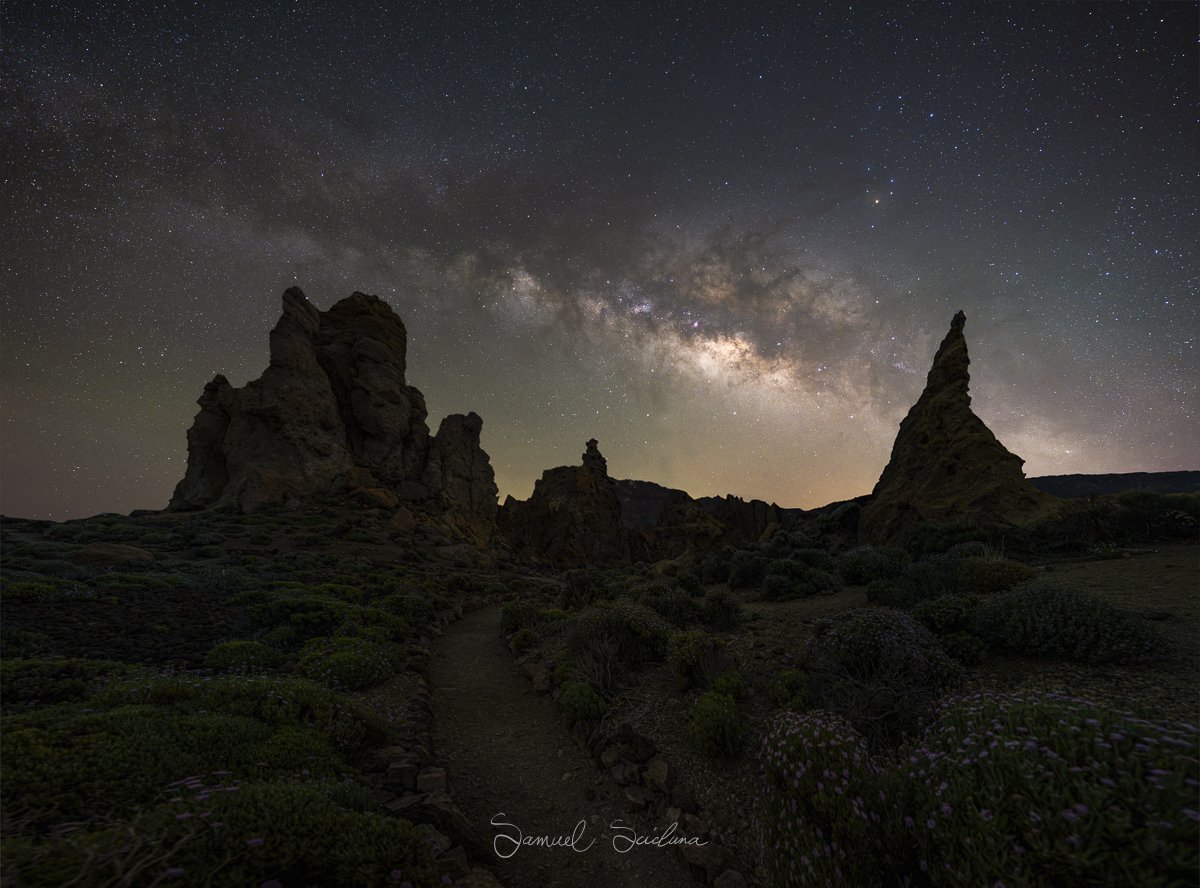
A Panoramic image made up of 2 shots (1 for the sky and 1 for the foreground), both processed using Lightroom Denoise AI
Prior to the April 2023 update to Lightroom Classic, Adobe’s Noise Reduction tools left a lot to be desired, lets's be honest, they were terrible!
Anyone who required noise reduction with acceptable results had to buy Topaz Labs Denoise, ON1 NoNoise AI, or DxO Deep Prime.

LR Denoise is incredibly easy to use, just chose the amount (Strength) of the Denoise using the slider which goes from 0% - 100%.
Adobe is definitely a little late to the party, considering their reputation, they really should have led the market with this, as they do with so many other tools, but the old adage ‘better late than never’ definitely holds true here, Adobe has taken their time, but they have made an incredibly effective Denoise tool.

A tracked 180° panorama made up of 10 images for the sky and 10 images for the foreground.
I have just got back from a 2-week trip to Tenerife where I spent 12 of the 14 nights shooting the Milkyway in Teide National Park. This was the perfect opportunity to put my new Nikon Z8 to the test and to produce the files to test Lightroom Denoise AI.

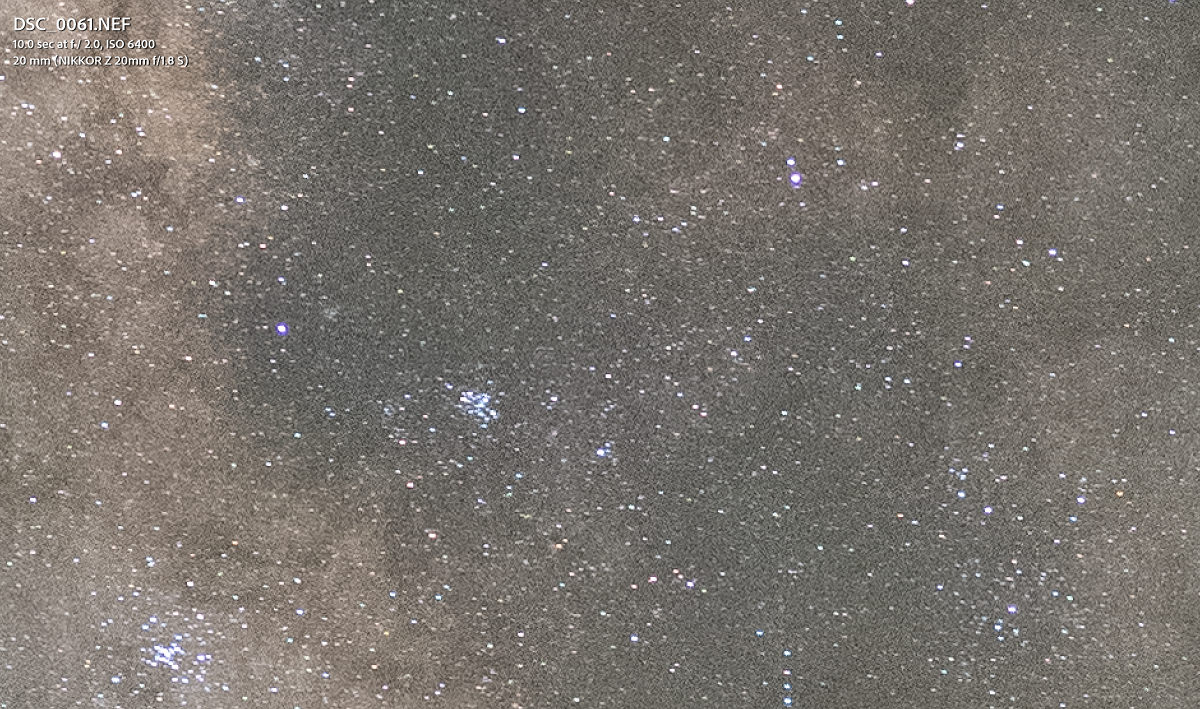
Raw File zoomed into 200% (Before Lightroom Denoise applied)

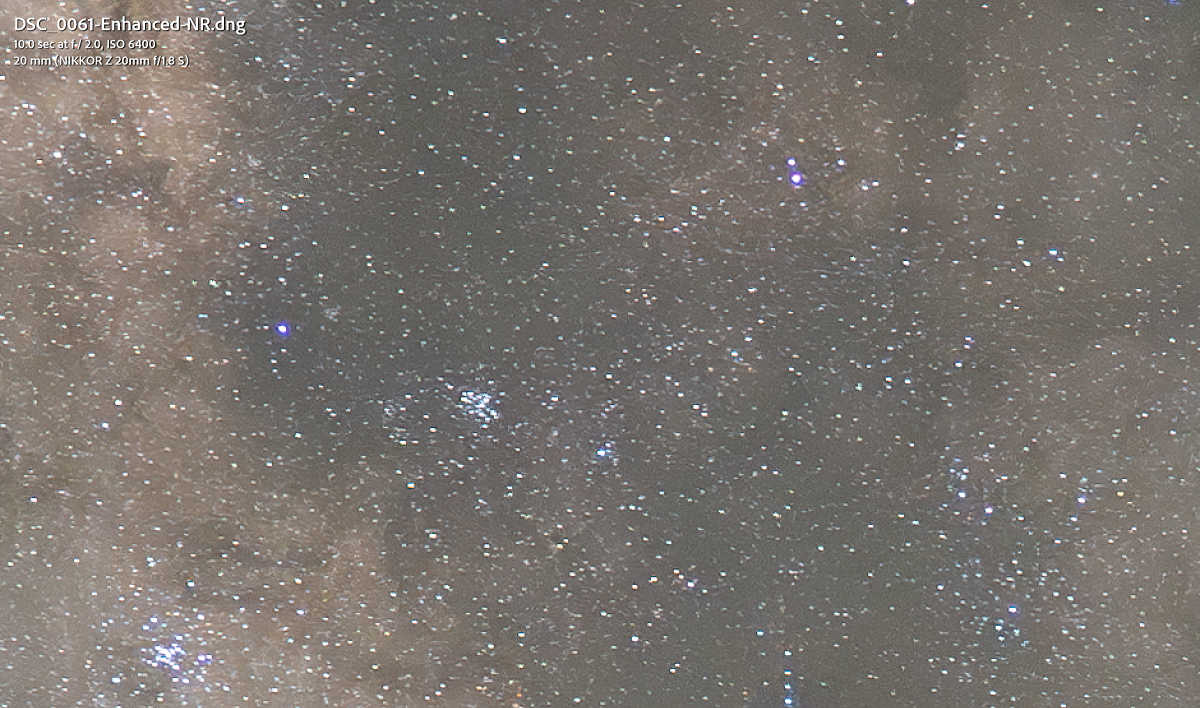
Denoised File zoomed into 200% (After Lightroom Denoise applied)
For which images do I use Lightroom Denoise?
I only have to deal with noise in my Milkyway images, naturally, when shooting at ISO6400, there will be significant amounts of noise in the image. I have found that Lightroom Denoise is also great for tracked images of the Milkyway!

A tracked 240° panorama made up of 14 images for the sky and 14 images for the foreground.
Artifacts
Lightroom Denoise does a great job with removing noise from the sky, but it can also create a lot of artifacts in the foreground if there isn’t enough data in the RAW file due to it being so underexposed and having too much noise. This should not really be a concern though, as you should always shoot a separate foreground image with its own relevant settings. For example, Sky shot: 10 Seconds / ISO6400 / F2.8. Foreground Shot: 240 Seconds / ISO800 / F2.8
Processing time
This is where processing power comes into the equation! My Macbook Air can Denoise an image in 30 seconds, my main (And supposedly much more powerful) PC takes significantly longer, sometimes up to 20 minutes to Denoise a single image. This is for 45-megapixel files from the Nikon Z8, naturally, smaller files will take less time to Denoise.

A tracked 180° panorama made up of 10 images for the sky and 10 images for the foreground.
Pros:
Part of Adobe Creative Clouds (No extra Fee for those that already use LR and PS)
Best noise reduction software (In my opinion)
Can batch Denoise multiple images in one go (If you have the processing power)
Incredibly easy to use, with only 1 slider
The preview gives you an accurate indication of what the final result will look like
Cons:
Lightroom Denoise AI can take several minutes to perform Noise Reduction, depending on your computer’s processing power
Currently cannot work on TIFF or DNG Files (Only Raw Files)
Artifacts can be created if too much Denoise is applied
Final thoughts:
Adobe has done a great job with their new Denoise AI tool, it helps suppress noise from images captured at high ISO without destroying detail in the image. Whilst there are some artifacts in the images if you push the Noise reduction too far, or if there is just too much noise, to begin with, this is to be expected, and is common across all Noise reduction software.