
If you shoot landscapes, seascapes or severe weather, then your tripod probably takes a beating. Sand, dust, salt and silt are a tripod’s worst enemy.
Frequently cleaning and maintaining your tripod is essential to keep it working smoothly and ensure it lasts many years and countless adventures.
There are 3 types of tripod maintenance, these are:
A quick wipe down with a damp cloth after using the tripod
A deep clean where you dismantle the tripod, clean all the parts individually, and then reassemble them
A full rebuild where you dismantle the tripod, replace the consumable parts (Shims, Cones, seals and any other worn parts) and reassemble the tripod to make it as good as new.
This guide will focus on the process of a deep clean and rebuild (As the steps are almost identical). The tripod used in this example is my Gitzo GT3543XLS. After 3 years of heavy abuse, I recently bought all the necessary parts to fully rebuild it.

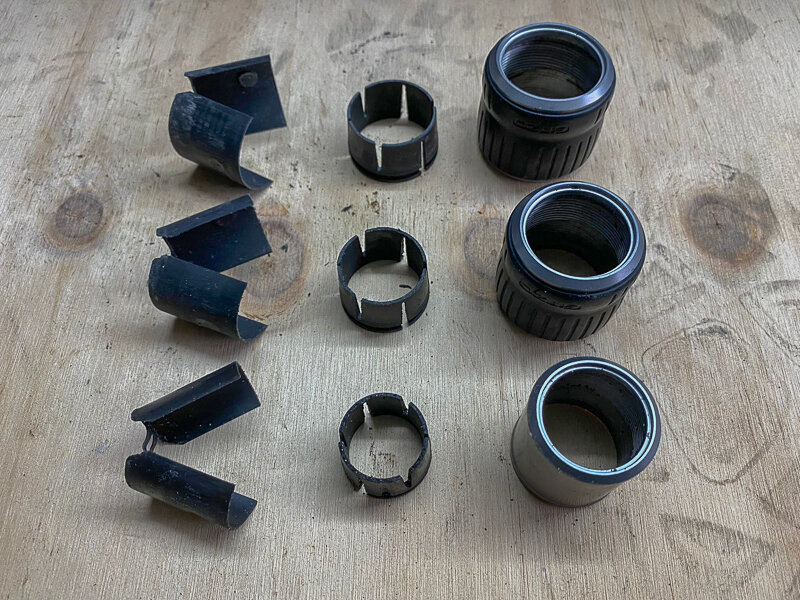
The spare parts I ordered prior to rebuilding my Gitzo GT3543XLS.
For both a deep clean and a full rebuild, you will need the following items, its best to prepare these items in advance to get the job done in a single sitting:
A bucket with warm soapy water
An old tooth brush
A rocket blower / Can of compressed air
Tools to dismantle the tripod (Specific to each tripod)
A damp cloth to wipe parts
A cotton cloth to dry cleaned parts
Suitable lubricants for reassembly (Silicone based grease and graphite powder)
Thread-lock to ensure any bolts and grab screws do not come lose under normal use
3 x plastic trays for all the parts you remove
Camera / Mobile – To take photos of each step (Helps with re-assembly)
Kitchen degreaser to dissolve any old grease and gunk

The ‘tools’ used throughout the process.
Tip: For anyone dismantling their tripod for the first time, I would recommend taking photos / videos at each step to use as a reference for re-assembly. Its also important to carry out the rebuild using a clean surface, free of dust and with some paper towels to absorb any water / dirt.
The first step to cleaning your tripod is taking it apart. All my tripods use the twist-lock system to adjust the legs (I specifically chose this system as I find it much better than lever-locks), meaning there are no tools required to dismantle the legs and separate each leg section.
Before you begin:
Note: It is best to remove any spikes / clawed feet prior to separating the legs from the spider as it will be more difficult to remove them later. Prior to dismantling the tripod, I label each leg and its corresponding mount on the spider with masking tape. I also prepare 3 small plastic containers and label these so that I do not mix the parts between the 3 legs.
Step 1 - Separating the legs from the spider
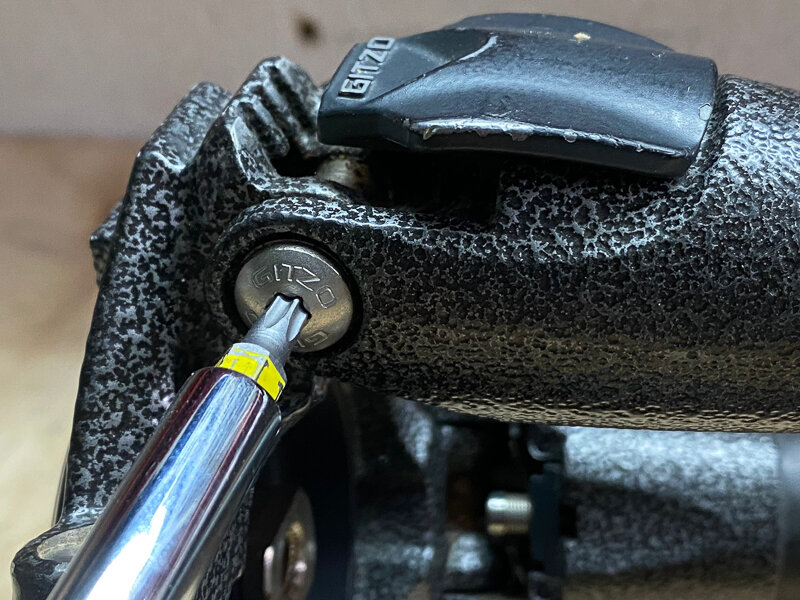
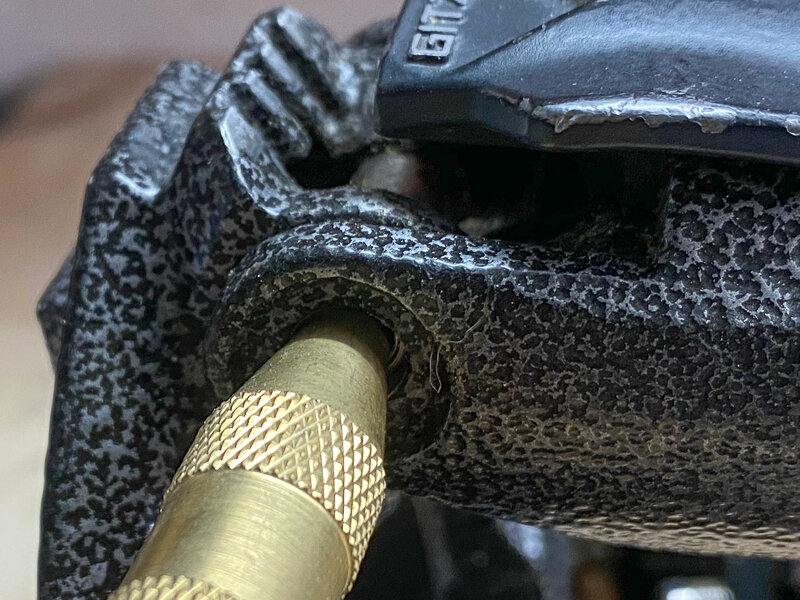
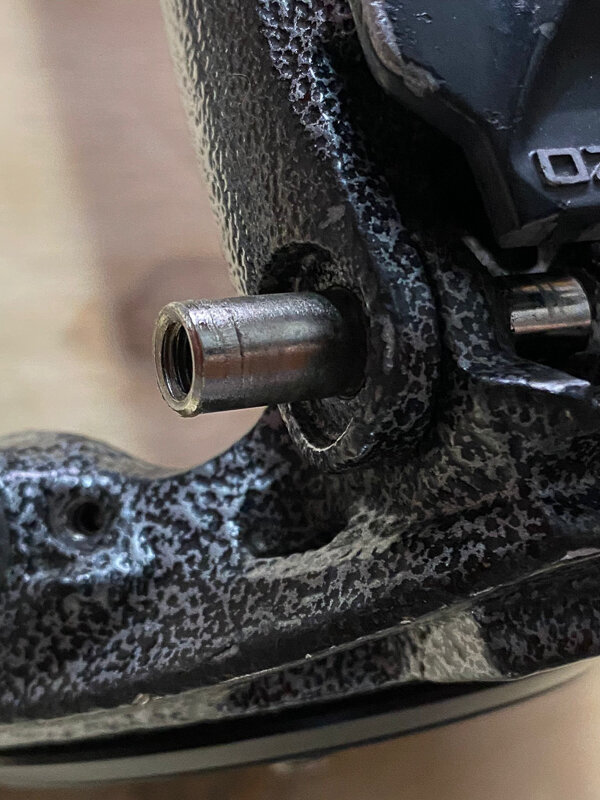
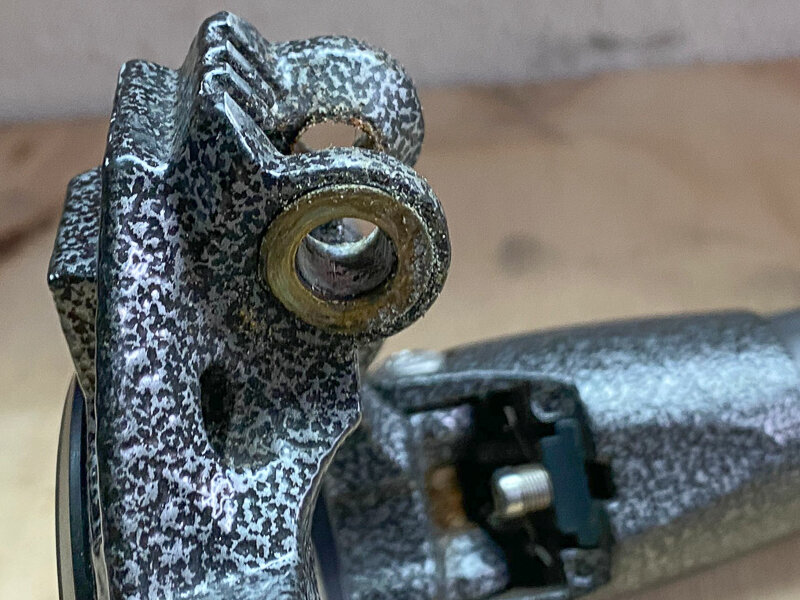
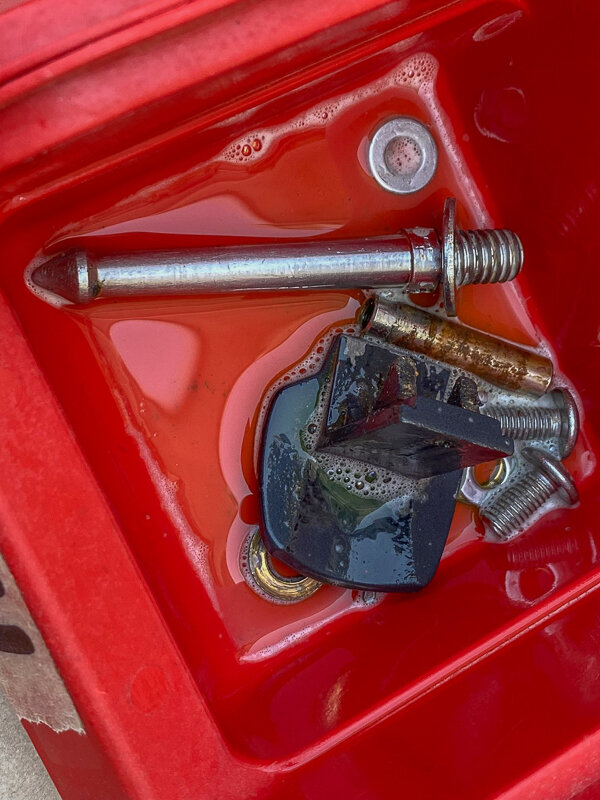
To separate the legs from the spider on the Gitzo GT3543XLS, you need to remove the 2 retaining bolts found on either side of the leg lock. Once these 2 bolts are removed (Be careful not to lose the washers), you can then remove the stainless steel Pin. The pin might need persuading if it has any corrosion or rust on it, I removed mine using a rounded tool and a few love taps with a small hammer to push the pins through.
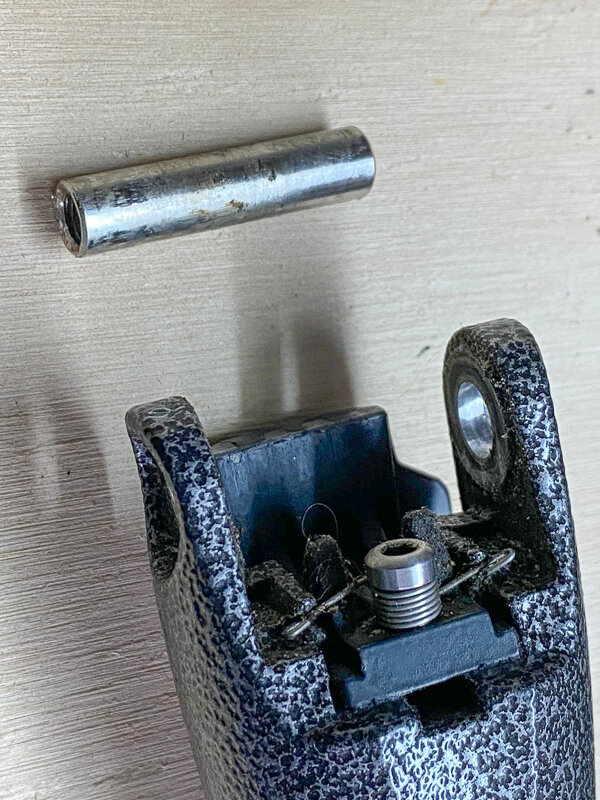
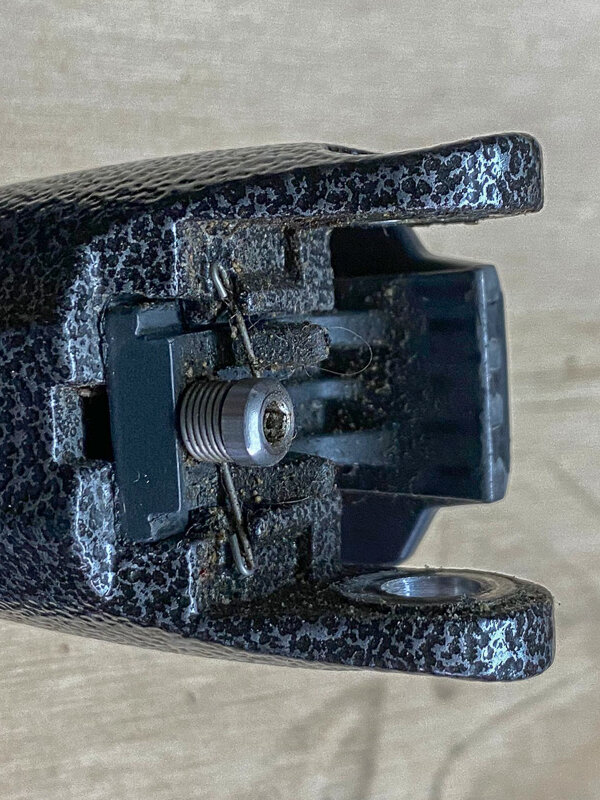
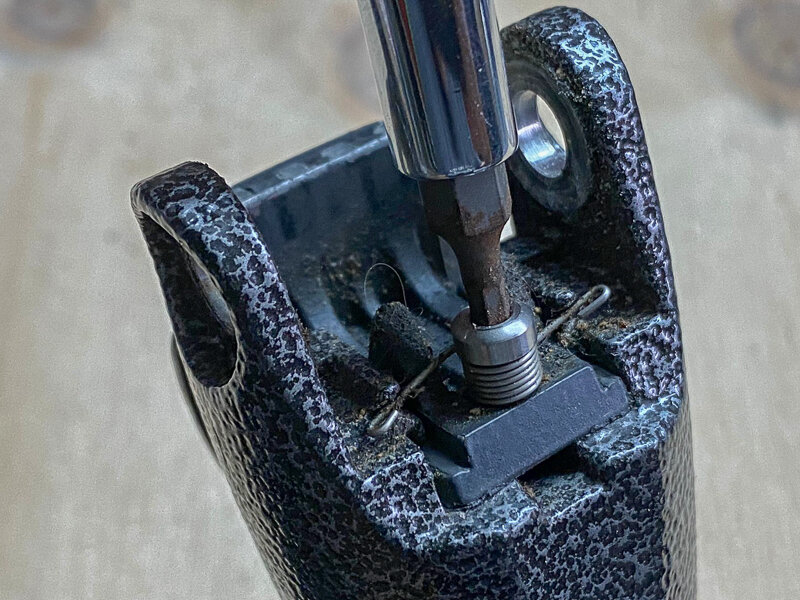
Once the pin is out, the leg can be separated from the spider. Be careful not to lose the brass washers (Spacers) which are used to reduce wear and tear between the leg and the spider. The next step is to removed the leg lock adjustment mechanism. This has a small allen bolt and is easy to remove. Be careful not to lose this small bolt and the tiny torsion spring.
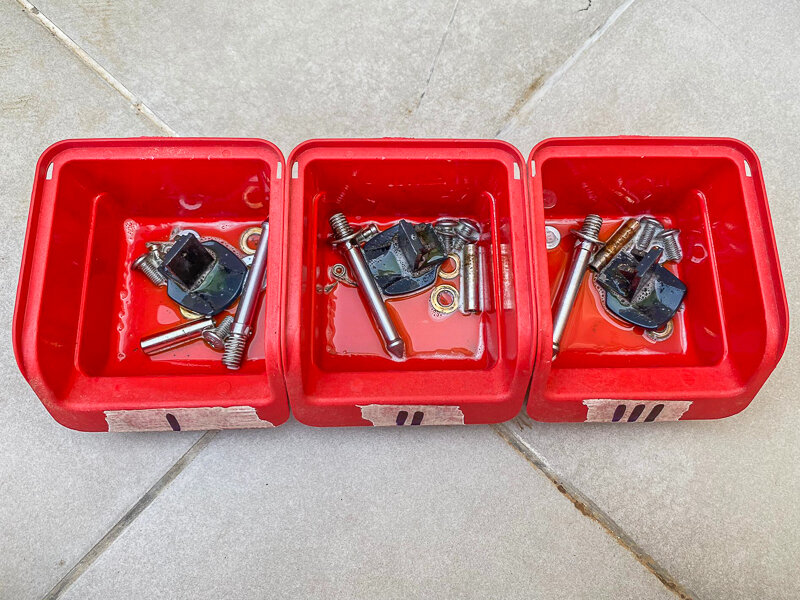
Once all these parts removed, you can put them into a plastic container and set them aside for later. I like to label each container to avoid mixing the parts from the different legs. Repeat the same process for the other 2 legs.
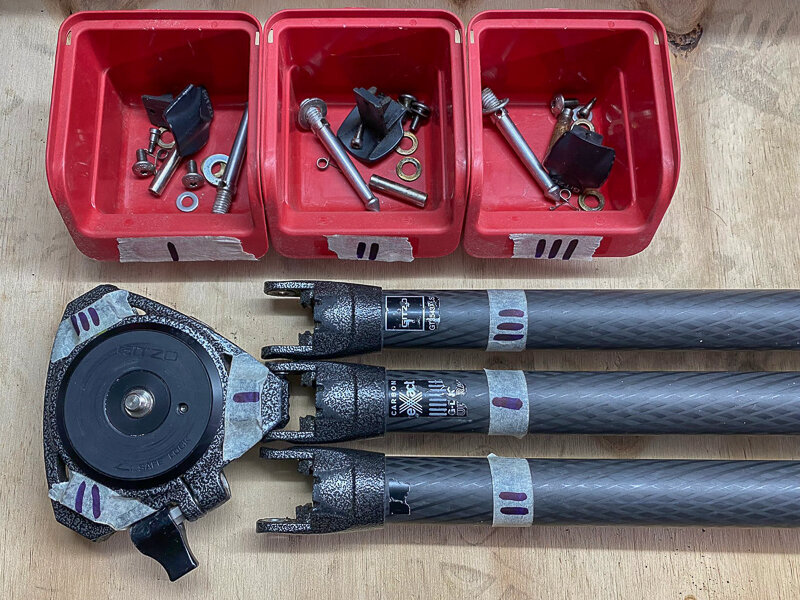
The fully stripped down tripod, with a specific container for the parts of each leg to avoid mixing them up.
Step 2: Dismantling the legs
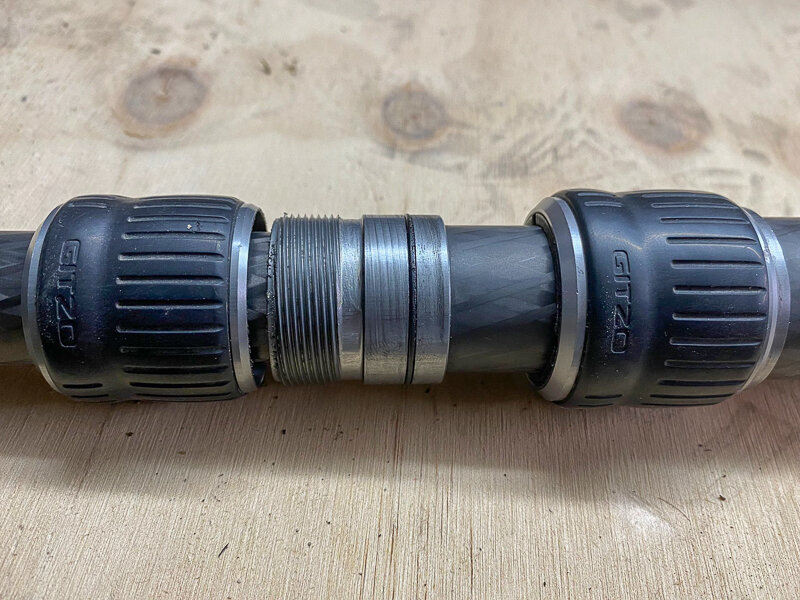
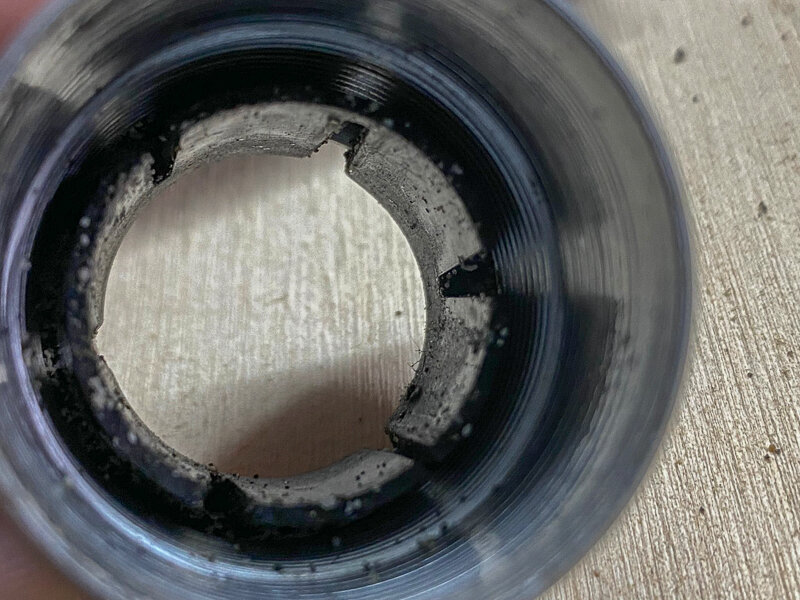
To remove the various leg sections, simply twist the twist-lock of each section as if you are extending the leg, but rather than just a quarter turn, keep twisting it until the twist-lock completely comes off the thread and comes free. It is best to loosen these one at a time so that each section does not rotate freely, making it more difficult to remove them later. You will now be able to slide the inner (smaller) leg tube out. Be careful not to lose the shims which come out with the inner leg tube.
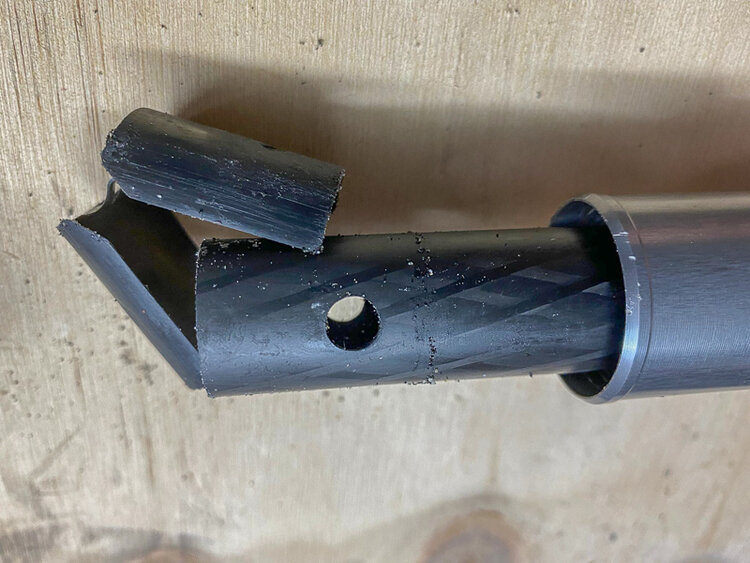
Its important to note which orientation the shims were in, in most cases, there is a specific gap between the shims which aligns perfectly with notches inside each leg tube, these caps and notches are used to keep the leg tubes from rotating / twisting.
The thin plastic shims are designed to take the brunt of the wear and tear from the friction caused by opening and closing the legs of the tripod. When doing a full rebuild it is ideal to replace these shims with new ones to help keep the leg sections of the tripod opening smoothly.
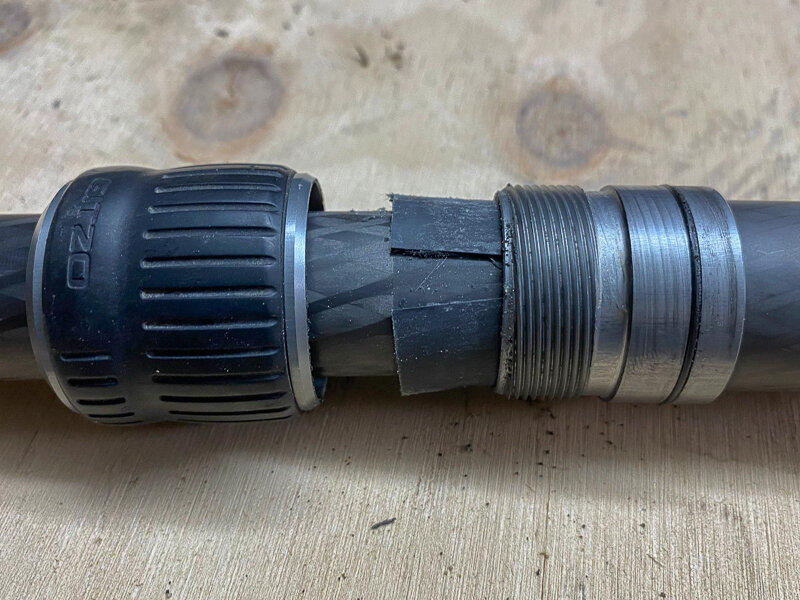
Each twist lock has a plastic cone inside it, this cone is what locks the leg in place when you twist the leg lock. If doing a full rebuild, its recommended to replace these cones too, as they also wear out over time.
Once you have dismantled all of the leg sections, lay them out in order (It is important not to mix the sections of different legs together).
Step 3 - Cleaning individual parts
Leg Tubes
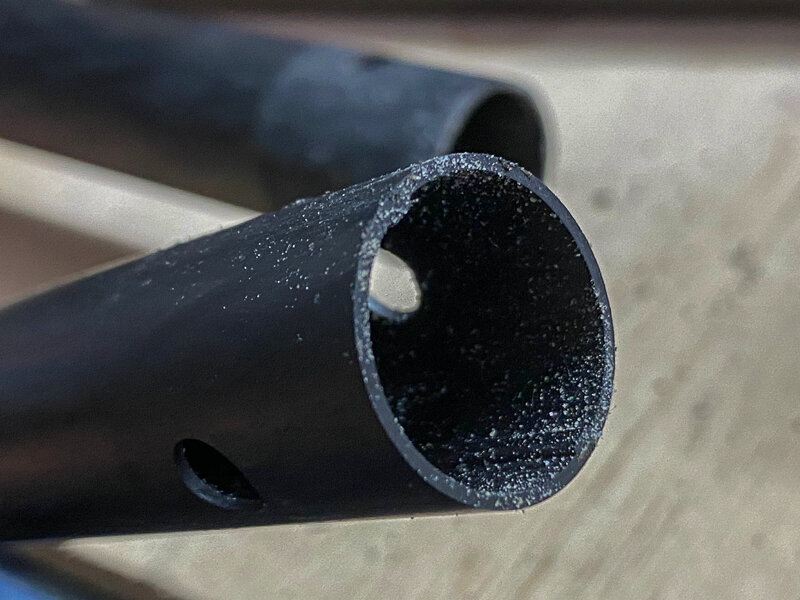
The inside of the leg tubes can be cleaned using a dust blower or compressed air, I prefer to use a bottle brush and some soapy water to ensure it is completely clean. For any really stubborn dirt, spray kitchen degreaser, allow it to work for a few minutes and then rinse thoroughly with a high pressure hose. Ensure that both the inside and outside of the leg tube is thoroughly rinsed and completely dry before reassembly.
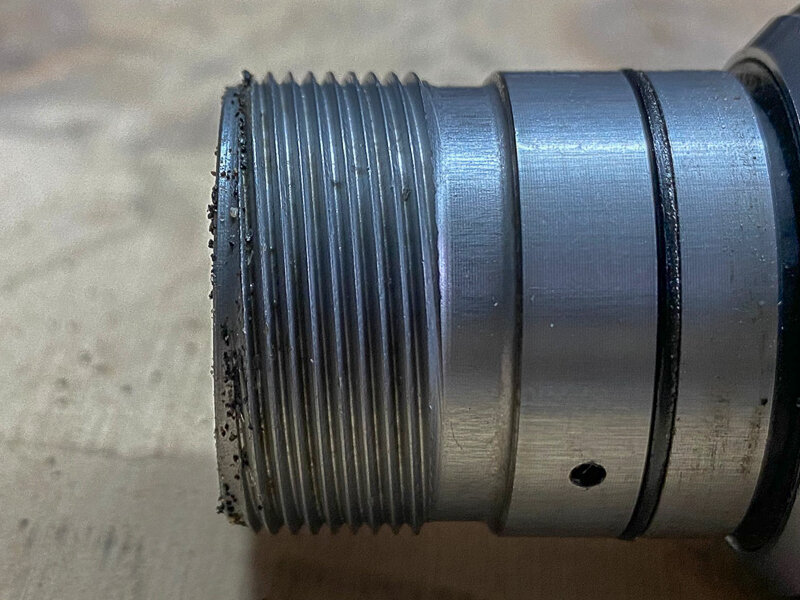
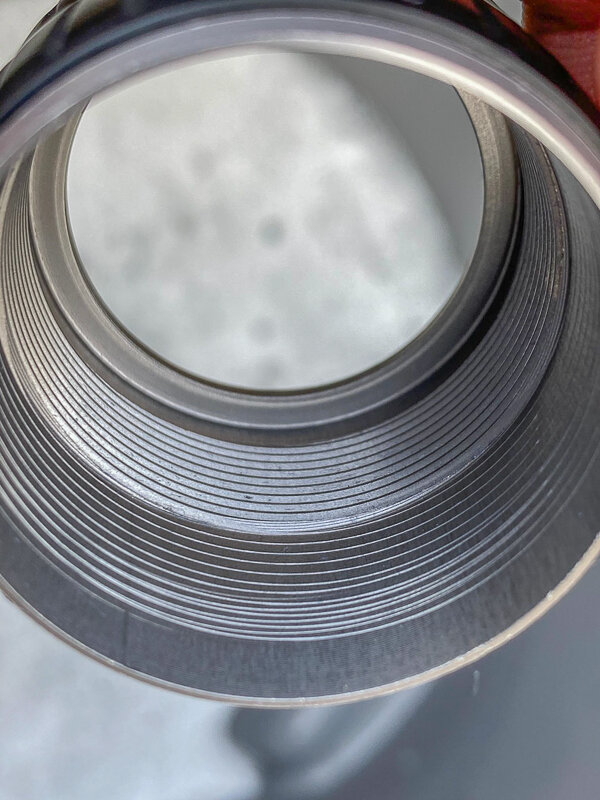
Leg threaded sections
One of the toughest areas to clean thoroughly is the threaded parts of the legs. Its best to start by trying to blow any debris out of the threads using a rocket blower or compressed air. The threads are greased from the factory to help maintain smooth operation, reduce friction and and also to reduce premature wear of the parts. Unfortunately, this grease acts like a magnet to both sand and dust, meaning loads of it ends up here. After blowing any loose debris out, use the toothbrush and warm soapy water to scrub the threads and remove as much of the grease, sand and dust as possible. For any really stubborn grease, spray kitchen degreaser, allow it to work for a few minutes and then rinse thoroughly with a water. Dry the threaded sections with a soft cotton rag before reassembly.
The Spider
The point to which the legs of a tripod attach is known as the spider, this part also needs cleaning from time to time as dust / dirt gets stuck to the grease, especially around the pins as these are covered in grease from the factory. I used kitchen degreaser here to remove all the old debris / gunk. I then rinsed it with clean water and dried it off using an old towel.
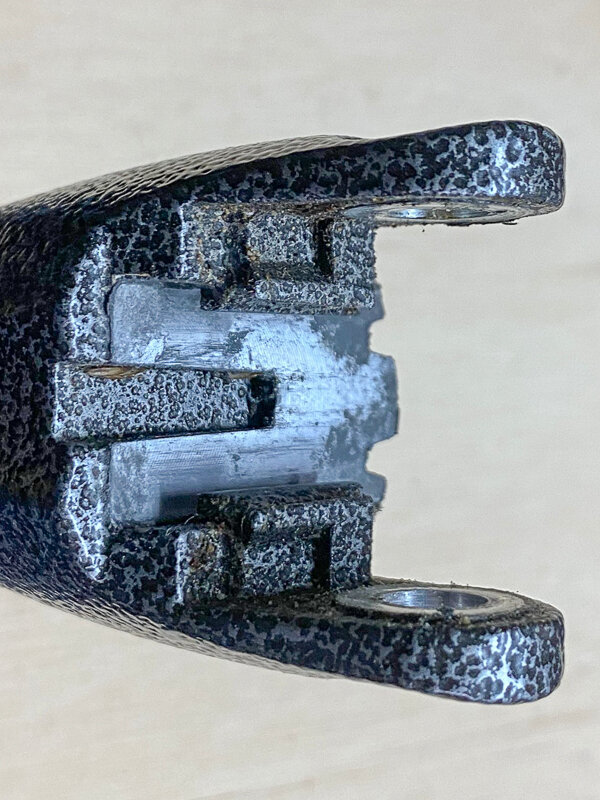
The leg angle adjustment locks
The leg angle adjustment locks tend to retain a lot of debris and dust in the grease (As with the spider). There is a spring clip which helps return the lock to its original position.
At this stage you can clean the bolts / pins and any washers / spacers by placing them in a small bowl and spraying them with kitchen degreaser. You should now have access to the leg angle adjustment locks, and can clean these in the same way.
Shims and Cones
If doing a deep clean, you will need to clean the shims and cones too. Ensure these are dry before reassembling. If you are doing a full rebuild (As I have done) and replacing both the shims and cones with brand new ones, there is no need to clean the old ones.
Step 4: Reassembly
Reassembling the tripod is easy, it follows the exact same steps as dismantling the tripod, but in reverse order. Instead of cleaning the parts, you will now be lubricating each part based on its specific needs.
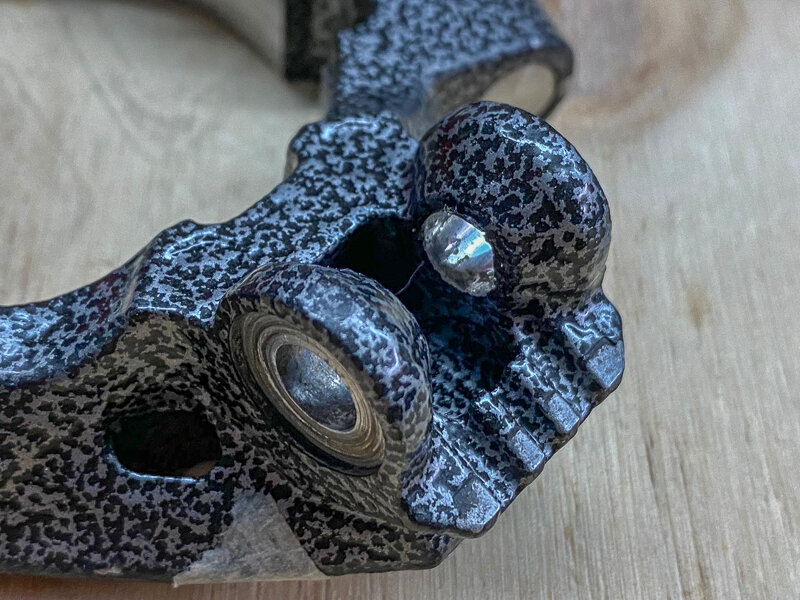
Leg angle adjustment locks
Lubricate the leg angle adjustment locks with silicone grease, ensure to lubricate the spring mechanism and the bolt / pin to ensure smooth operation and protect them from the elements.

The Leg angle adjustment locks cleaned, lubricated with Silicone Grease and reassembled.
Attach Legs to Spider
I put a dab of grease between the brass washers and the milled part of the spider, this tiny bit of grease helps keep the washers from falling out whilst reattaching the Legs.
The brass washers in place prior to attaching the legs to the spider.
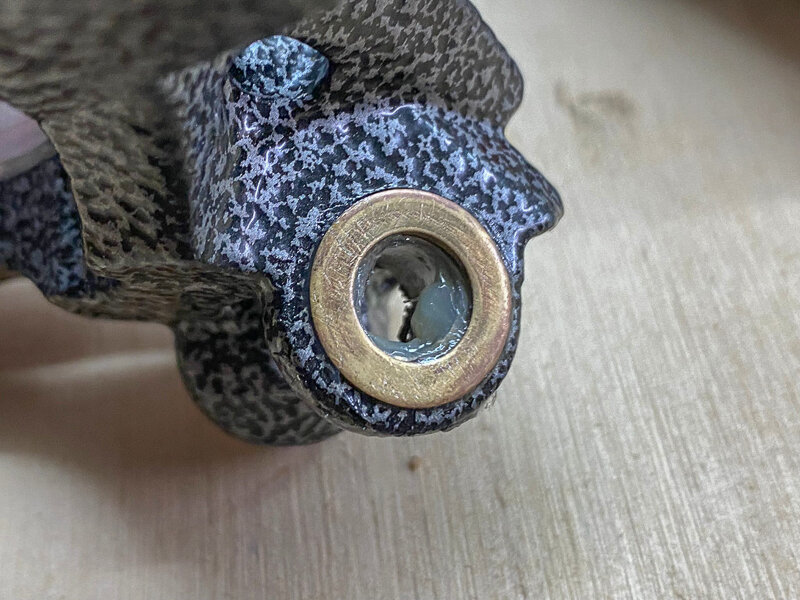
Once this is done, align the leg and pass the stainless steel pin through the eyelet on the legs and the spider. Then add the screw and washer to either side of the pin, there is no need to tighten these just yet. I decided to change the pin below as it had corroded and rusted.

A brand new Pin with 2 x brass washers, 2 x stainless steel washers and 2 x stainless steel bolts to replace the original ones which were a little worse for wear.
Shims
Lubricate the shims using graphite powder. When re-assembling the shims, ensure they are in the correct orientation, most leg tubes have a hole which is to be matched to the notch on the shim, preventing the shims from moving around or rotating, for this reason, the inside of the shims does not need to be lubricated.
Place a small amount of Graphite powder on the outside of each shim as you slide each section of the leg into the other corresponding section of the leg.

A cleaned leg lock and new plastic cone mounted to it.
Cones
The cones clip into the leg locks, and should rotate freely once seated properly. Lubricate the cones by adding a small amount of graphite powder to them.
O-Rings / Seals
It’s important to lubricate the rubber O-rings / seals with a silicone-based grease to ensure these are not pinched / nipped when reassembling the legs as these are the main barrier to keep dust and debris out of the legs. It is these O-ring / seal which prevent most of the dust / sand from getting into the legs and leg locks.

The O-Ring and threaded part of the leg with Silicone based grease applied and the shims on the Right lubricated with Graphite Powder.
When re-assembling the legs, make sure that the anti-rotation notches are properly aligned and that the shims and cones are in place before assembly. Once fully re-assembled, work the legs by opening and closing them several times (This allows the lubricants to find their place and start working) and work the spider by opening and locking the legs as each of the different angles. Add any additional lubricant to areas which need it to ensure they are protected and operate flawlessly!
Conclusion
Your tripod should feel as good as new! A properly cared for and cleaned tripod will last several years and many adventures. The process took me about 2 hours in total, 30 minutes to dismantle everything, an hour to clean everything and 30 minutes to reassemble it. Although this might seem like a lot of work, its fun to do and will can help make your tripod feels new and silky smooth for much longer!

Reassembled and as good as new!
Liability Disclaimer: The steps explained in this guide are steps I have come up with through my own experience in maintaining tripods over the years, they may not be the recommended steps by your tripod manufacturer. Always follow the recommended maintenance procedures for your specific product and if you are not comfortable doing this yourself, then get a professional to do it.