

The Galactic Centre of the Milkyway and Mars above the Tre Cime di Lavaredo in the Dolomites, Italy.
The Milky Way is our home galaxy. It is a spiral galaxy in the form of a disk. The Milkyway is visible all around us in the night sky, but the most interesting part, especially for photography, is the galactic center, which is the brightest and most colorful part of the Milkyway due to a high density of stars and dust lanes.
Due to the Earth’s rotation, the galactic center (From here on referred to as GC) of the Milkyway is constantly moving in the night sky. Apart from sliding across the sky each night, it is also visible in different locations throughout the year because it rises and sets in different places (Azimuths). In Malta, the Galactic Center of the Milkyway is visible from the beginning of February till the end of November. However the ideal time to capture the Milkyway is in the summer months, when the Galactic Center is higher up in the sky (Higher Elevation) and is also further South in the night sky (Better Azimuth), meaning it is further away from light pollution sources.
Planning:
Like with any other form of landscape photography, planning is paramount to achieving good results. Before choosing a location to shoot the MW from, you need to know where the Milkyway will be in the night sky, as this varies significantly from one month to the next. You also need to ensure that the location is not swamped in light pollution, which will make it impossible to get a good shot of the Milkyway.
Below is a comparison to show just how much the Galactic center moves across the night sky throughout the year. The times, Azimuths and Elevations are all calculated at roughly the center of Malta.

The variations in the location of the Milkyway on the below mentioned dates. Moving from February (Left) to November (Right).
15th Feb - GC visible at about 03:45; Azimuth of 126 Degrees and Elevation of 14.7 Degrees
15th May - GC visible at about 23:00; Azimuth of 126 Degrees and Elevation of 23.7 Degrees
15th Aug - GC visible at about 21:30; Azimuth of 183 Degrees and Elevation of 25.2 Degrees
15th Nov = GC visible at about 18:30; Azimuth of 231 Degrees and Elevation of 2.1 Degrees
The Milkywa’s location in the sky will make all the difference to your images. Its also important to note that different locations will only work at certain times of year. The Milkyway will rise to the South East earlier in the year, and to the South West later in the year.

Planning a shot of the Milkyway over the Chapel in Dingli, Malta. The dropped pin shows the location I shot from, and the white line intersecting the Chapel, shows the location of the Milkyway. As you can see from the details, this was shot around the middle of June at Midnight.

The final image, the Galactic Center of the Milkyway above the chapel of Mary Magdalene in Dingli, Malta.
Capturing the images on your camera
Like any other form of night sky photography, you need to let as much light as possible into your camera, this means longer exposures, higher ISO and wide open apertures. Unfortunately though, its not as simple as just using a very long exposure to get more detail, as due to the rotation of the earth (Which put simply is roughly 15 degrees of rotation per hour), the stars in your image will begin to trail and no longer be nice and round. This is great if you want to shoot star trails, but for Milkyway shots, you want round and sharp stars. When shooting the Milkyway, the exposure time will be dictated by your focal length of your lens and whether your body is full frame or crop sensor.

The Planning stage of the shot below from il Blata tal Melh, Malta. The camera is placed where the pin is dropped, you can see that the Milkyway is almost vertical and positioned right between the 2 boulders.
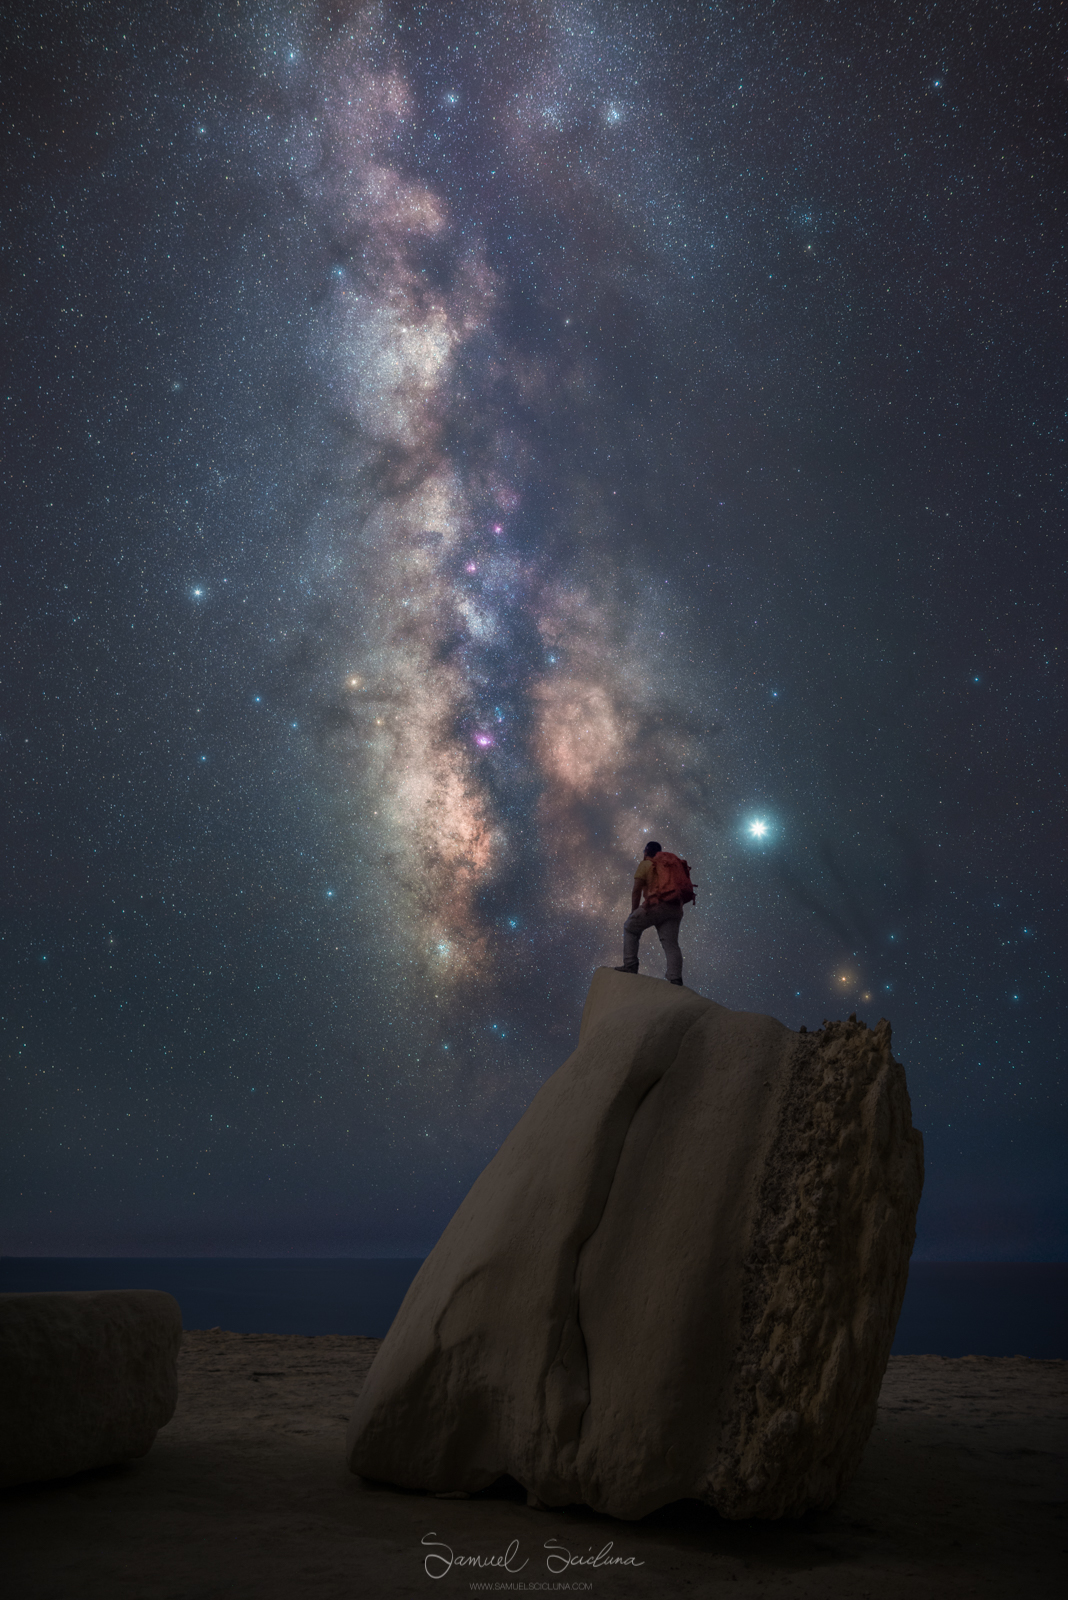
The final Result. A selfie standing on a huge boulder at il Blata tal Melh, Malta.
Shutter Speed:
When photographing the stars at night, you can use the 500 rule to estimate the longest shutter speed that you can use before the stars being to trail. The idea behind the 500 rule is to provide you with a quick way to chose the right shutter speed and effectively ‘freeze’ the rotation of the stars to get pin sharp stars.
The 500 rule means that your shutter speed should be equal to 500 divided by the Focal Length of your lens multiplied by the crop factor of your camera body.
Example 1:
Using a 24mm Lens on a Nikon Crop Sensor body (1.6 Crop Factor):
Shutter Speed = 500 / (Focal Length x Crop Factor)
Therefore: 500 / (24 X 1.6) = 13.0208 Seconds
Using a Shutter speed of 13 Seconds should result in having pin sharp and round stars in your images with a 24mm len son a Nikon Cropped Sensor camera body.
Example 2:
Using a 24mm Lens on a Nikon Full Framer body (No Crop Factor):
Shutter Speed = 500 / Focal Length
Therefore: 500 / 24mm = 20.8333 Seconds
Using a Shutter speed of 20 Seconds should result in having pin sharp and round stars in your images with a 24mm lens on a Full Frame camera body.
Example 3:
Using an Ultra wide angle lens, with a focal length of 16mm on a Full Frame Body:
Shutter Speed = 500 / Focal Length
Therefore: 500 / 16mm = 31.25 Seconds
Now that you you have calculated the longest shutter speed you can use, you need to decide on an aperture and ISO. Since you need to let in as much light as possible, its best to go for a wide open aperture (Ideally F2.8 or wider) and a high ISO value such as 1600, 3200 or even 6400.
The Milkyway above the cliffs of Fomm ir Rih, in the North West coast of Malta.
Focus:
Forget autofocus when you are in the middle of nowhere in the pitch dark! You need to be able to manually focus your lens. There are two ways to do this, you can either focus your lens to infinity before it gets dark and tape the focus ring to avoid it moving, or you can use live view to find a bright star, magnify it in live view mode and turn the focus ring until you get the star as sharp as possible.

The Milkyway over the Cadini di Misurina in the Dolomites, Italy.
Equipment needed to photograph the Milky Way:
Sturdy Tripod – You want a sturdy tripod, as any camera shake will ruin the image
A DSLR / Mirrorsless camera which has a manual mode
An Ultra wide or wide angle lens which is as fast as possible (Widest possible Aperture)
Intervalometer (If you intend to capture a time-lapse sequence of the Milkyway)
Basic things to remember:
Plan in advance and know when and where to see the Milkyway
Check the weather forecast, you want a clear night which is not too humid
Find the darkest sky in your area and avoid nights where the moon is visible
Use a DSLR or Mirrorless camera with good high ISO performance
Use a fast and wide angle Lens (An aperture of F2.8 or faster is ideal)
Use a sturdy tripod
Get to your location early to scout for foreground interest
Use live view to focus on a bright star or distant light
Start with basic settings such as 15 Second at F2.8 and ISO 3200, then adjust your settings accordingly
Although the subject of your images is likely to be the Milkyway, composition is still extremely important if you want a compelling image
Take a thermos full of coffee or any other drink as you can be out enjoying the night sky for hours
My gear for Astrophotography
Gitzo GT3554 XLS Tripod with a Sunwayfoto XB-44 Ballhead
Move shoot move Sifo Rotator (Star Tracker)
Nikon D810 Full Frame Camera Body
Samyang 14mm F2.8 Lens
Samyang 24mm F1.4 Lens

The Gear I used to capture the Milkyway.
Conclusion
Knowing your camera inside out and being able to focus, change your composition, aperture, ISO and Shutter speed in complete darkness is a must. This is because the Milkyway is constantly moving in the night sky, and if you waste time faffing around with settings, the Milkyway may have moved enough to ruin you composition.
Night sky and astro-photography is where the equipment you use can make a significant difference to the result. Any entry level modern DSLR should give usable images (Not too much noise) shooting 30 Seconds at ISO 800, but when you crank it up to ISO 6,400 and shorter shutter speeds, these cameras will not deliver printable images.

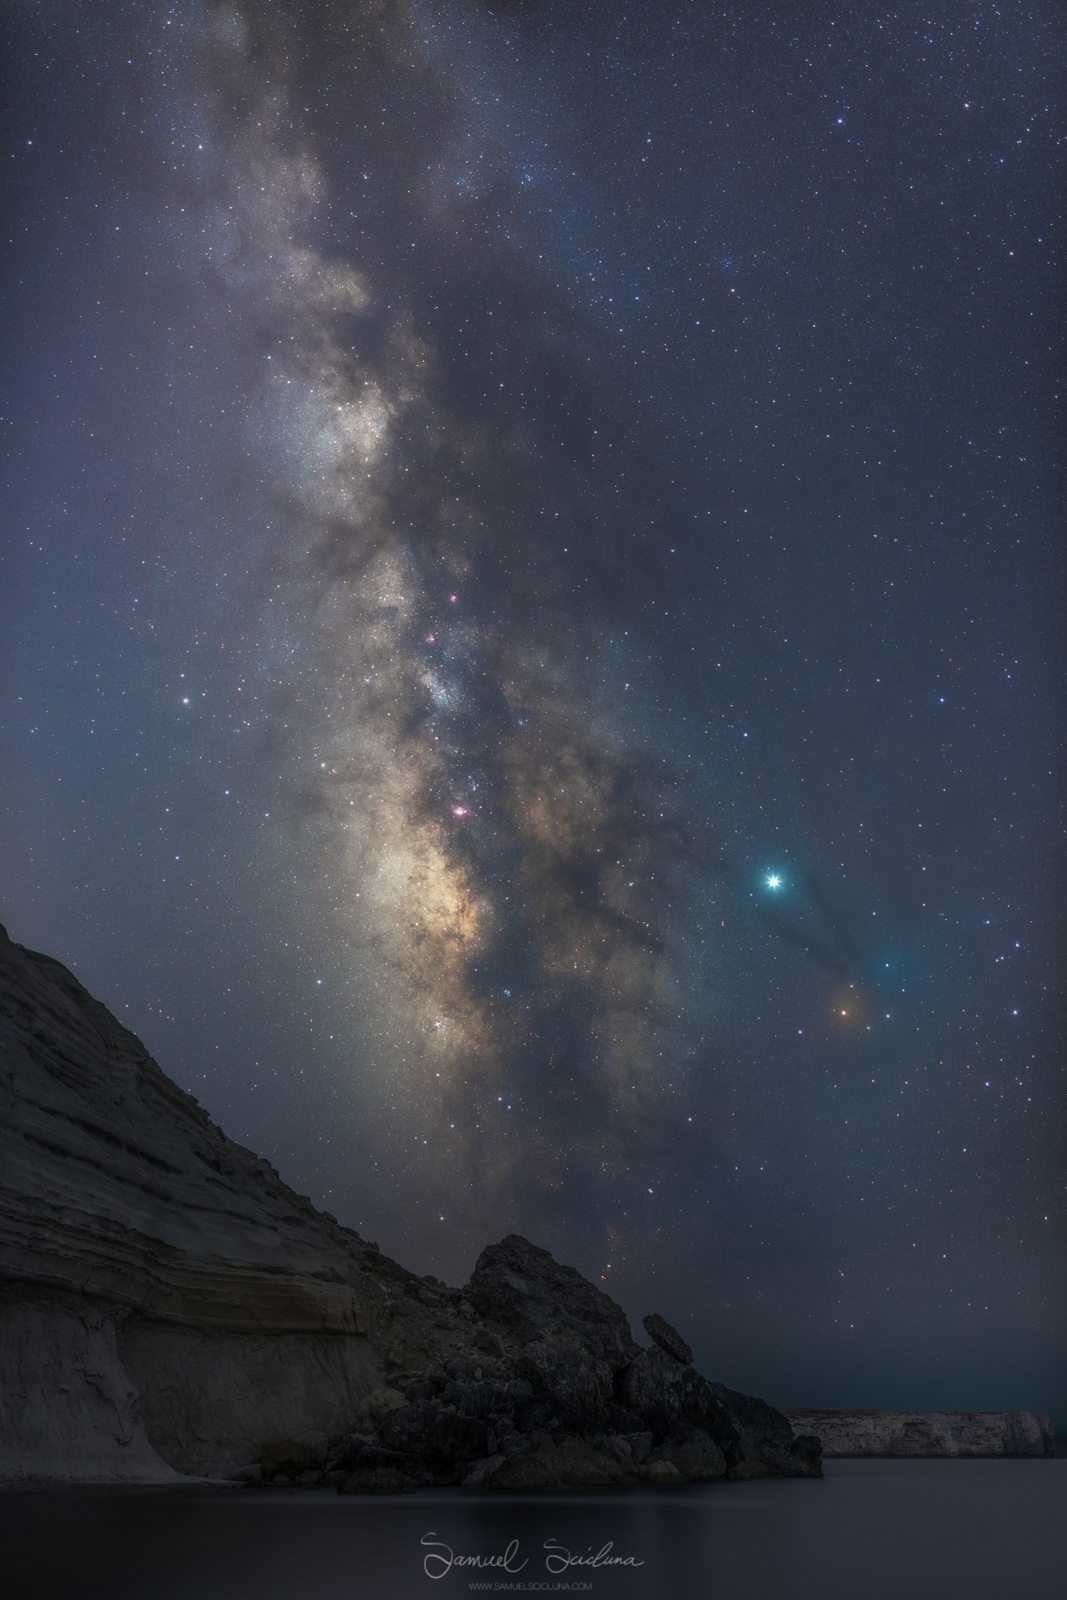
A Tracked image of the Milkyway over Ras il Mignuna in Qrendi, Malta.
I have recently started using a Star tracker to get better quality images of the night sky, you can see my review of the tracker I use here (Note: There is also a discount if you order through the link).

The Milkyway from Mtahleb in Malta.
Note about Light Discipline - If you are shooting with other people and keep using a torch / headlamp to check your camera settings, you are going to put unwanted light on the foreground, messing up other people’s shots! Like with all other types of night photography, light discipline is extremely important. Its disrespectful to keep shining light and spoiling other people’s photos. Don’t be that person who pisses everyone else off!